
Why a Fuse Block Is Non-Negotiable in Any 12V Build
Every accessory in your overlanding rig needs its own fused circuit. Running multiple devices off a single fuse is a fire risk and a diagnostic nightmare — when something blows, you lose everything on that circuit at once and have no idea what caused it. A properly wired distribution fuse block gives every device its own protected circuit, makes troubleshooting simple, and keeps your wiring clean and organised.
This guide covers everything you need to plan, size and wire a 12V fuse block in a truck, 4WD or van build — from choosing the right block, to cable sizing, to the correct order of connections. We’ll also cover common mistakes that cause blown fuses, melted wiring, and voltage drop issues.
Fuse Block Types: Blade vs ANL vs MIDI
Blade Fuse Blocks (The Right Choice for Accessory Distribution)
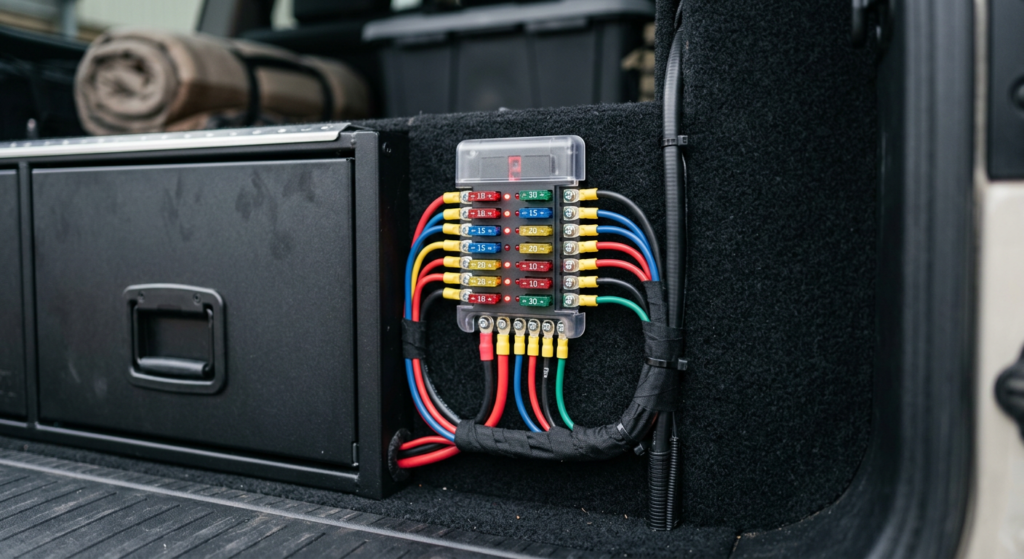
Blade fuse blocks — also called ATC/ATO fuse blocks or ST blade fuse blocks — are what you want for distributing power to multiple accessories. They accept standard automotive blade fuses (2A through 40A), are compact, easy to work with, and cheap to replace fuses. The Blue Sea Systems ST Blade Fuse Block is the industry standard for overlanding builds — it’s marine-grade, has integrated bus bars, and comes with optional covers and LED indicators.
ANL Fuse Holders (Main Line Protection Only)
ANL fuses (100–400A) protect your main cable run from the battery to the fuse block. They are not distribution blocks — they’re a single large fuse in the main positive cable, placed within 300mm of the battery. Every 12V build needs one. Do not confuse ANL fuse holders with distribution blocks — they serve completely different purposes. See our dual battery wiring guide for details on ANL placement.
MIDI Fuse Holders (Mid-Range Protection)
MIDI fuses (30–200A) sit between blade fuses and ANL fuses in terms of current capacity. They’re used for protecting sub-circuits — for example, a dedicated run to an inverter or air compressor that draws more than a blade fuse can handle but doesn’t need an ANL. Optional for most builds, but useful for organising high-current sub-circuits.
Choosing the Right Fuse Block
When selecting a blade fuse distribution block, here’s what to look for:
- Number of circuits: Count every accessory you want to run — fridge, lights, USB hub, air compressor, inverter, comms, camp lighting — then add 30% for future expansion. A 6-circuit block fills up faster than you’d think.
- Negative bus bar: Get a block that includes a negative/ground bus bar, or buy a separate one. Running all grounds to a central bus keeps wiring clean and avoids ground loops.
- LED indicators: Blocks with per-circuit LED indicators tell you at a glance which fuse has blown — worth the small extra cost.
- Cover/weather protection: If the block is mounted anywhere near moisture (which in a vehicle is almost everywhere), get one with a cover. Blue Sea Systems and Narva both make covered versions.
- Current rating: The block’s total rated current must exceed the sum of all circuits it feeds. A 100A rated block feeding ten 10A circuits is fine. A 60A block doing the same job will be undersized.
How to Size Your Fuse Block Feed Wire
The cable feeding your fuse block from the battery (or aux battery) must be sized to carry the total maximum current of all circuits combined. Add up the fuse ratings of every circuit in the block, then use that total to select the feed wire gauge.
Example: A 10-circuit block with circuits fused at 5A, 10A, 10A, 10A, 15A, 15A, 20A, 20A, 10A, 5A = 120A total. That needs a 4 AWG feed wire for runs under 3 metres. For longer runs, step up to 2 AWG.
The ANL fuse on the main feed line should be rated at 125% of the total expected load — in this example, a 150A ANL fuse. For a full breakdown of wire sizing by amps and run length, see our complete 12V wire sizing guide.
How to Size Individual Circuit Fuses
This is where most people get it wrong. The fuse protects the wire, not the device. Choose your fuse rating based on the wire gauge used for that circuit — not based on the device’s current draw.
| Wire Gauge | Max Fuse Rating | Typical Use |
|---|---|---|
| 18 AWG | 5A | Small LED lights, sensors, control wiring |
| 16 AWG | 10A | USB hubs, small 12V accessories |
| 14 AWG | 15A | LED light bars under 150W, small compressors |
| 12 AWG | 20A | Fridge circuit, larger lighting, comms equipment |
| 10 AWG | 30A | High-draw accessories, secondary inverters |
Rule: Never install a fuse larger than the wire can safely carry. A 20A fuse on 18 AWG wire will let the wire overheat and melt before the fuse blows — defeating the entire purpose of fusing.
Step-by-Step: How to Wire a 12V Fuse Block
- Choose your location. Mount the fuse block where it’s accessible, protected from direct water ingress, and close to the loads it’s feeding. Behind a rear seat, inside a drawer system, or in a dedicated electrical compartment are all good options. Avoid mounting directly on the floor where it can sit in water.
- Plan your circuits. List every accessory and its peak current draw. Assign each its own circuit and choose the wire gauge for each run. Group circuits logically — fridge and comms on separate circuits so a blown fuse never kills both at once.
- Run the main feed cable from the battery. Run your sized feed wire (4 AWG or 2 AWG depending on total load) from your aux battery positive terminal, through an ANL fuse holder mounted within 300mm of the battery, and to the positive input on the fuse block. Use a grommet wherever the cable passes through metal.
- Connect the main negative. Run an equally sized negative cable from the fuse block’s negative input (or ground bus bar) directly back to the battery negative terminal. Do not rely on chassis grounds for your main return path in a well-built system.
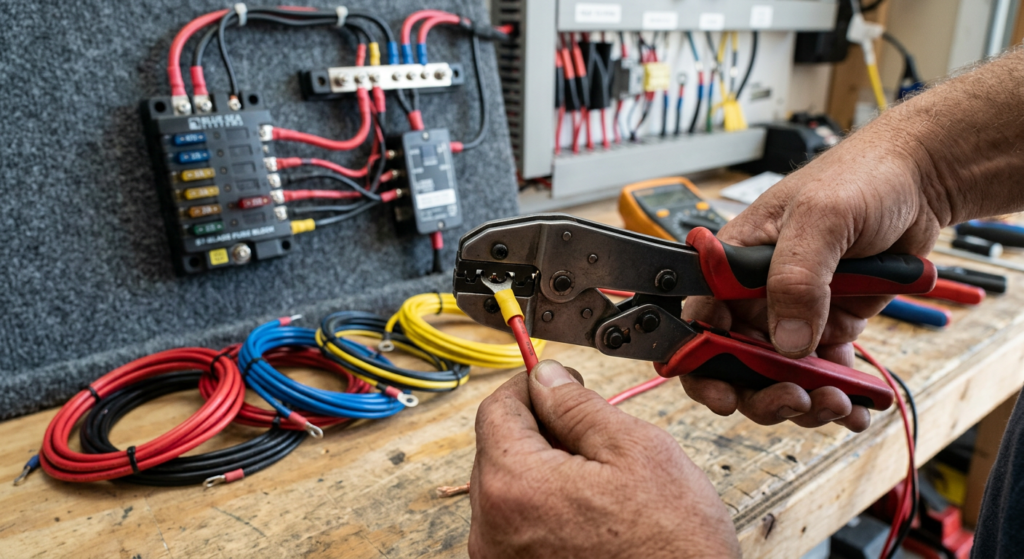
- Wire each circuit. For each accessory: run the correctly sized positive wire from the fuse block output terminal to the device, and run the negative back to the ground bus bar. Terminate all connections with correctly crimped ring terminals or spade terminals — no bare wire connections.
- Install fuses last. With all wiring complete and double-checked, install the blade fuses for each circuit. Test each circuit individually before adding the next fuse.
- Label everything. Use a label maker or cable tags on every wire at both ends. You will not remember what every wire is six months from now, and neither will anyone helping you diagnose a problem in the field.
Common Fuse Block Wiring Mistakes
- Running multiple devices on one circuit. If two devices share a fuse and one has a fault, both lose power and the fault is harder to trace. One device, one circuit, one fuse.
- Chassis grounding instead of a dedicated ground return. Chassis grounds work but introduce resistance and potential ground loops. For a clean, reliable build, run dedicated negative cables back to the battery or a ground bus bar connected to the battery.
- Using the wrong fuse size for the wire. Size the fuse to protect the wire, not the device. This is the most common mistake and the most dangerous.
- No ANL fuse on the main feed. The main cable from the battery to the fuse block must be protected close to the battery. Without an ANL fuse, a short anywhere in that cable can cause a fire before any blade fuse blows.
- Mounting the fuse block in a wet location without a cover. Moisture causes corrosion on fuse contacts, which causes resistance, which causes heat. Always use a covered fuse block or add a protection cover.
- Not leaving room for growth. A fuse block with every circuit occupied is a fuse block that needs replacing when you add the next accessory. Buy one size larger than you think you need.
Gear Shopping List
Here’s what you need for a complete fuse block installation. Quality matters here — this is the central hub of your entire electrical system.
| Item | Recommended Pick | Why | Link |
|---|---|---|---|
| Blade Fuse Block (12-circuit) | Blue Sea Systems ST Blade Fuse Block 12-Circuit | Marine-grade, LED indicators, negative bus bar included, covered version available | Check Price → |
| Negative Bus Bar | Blue Sea Systems 100A Common Bus Bar | Centralises all ground returns, rated for high current, stainless hardware | Check Price → |
| ANL Fuse Holder + Fuses | Blue Sea Systems ANL Fuse Block with Cover | Protects the main feed cable — essential, not optional | Check Price → |
| 4 AWG Feed Wire | WindyNation 4 AWG Pure Copper Welding Cable | Flexible pure copper for the main feed run from battery to block | Check Price → |
| Ring Terminal Assortment | Wirefy Marine Heat Shrink Ring Terminals | Adhesive-lined heat shrink — use on every connection in a vehicle build | Check Price → |
| Ratchet Crimper | Wirefy Ratcheting Crimping Tool | Consistent gas-tight crimps every time — don’t use a cheap squeeze crimper | Check Price → |
Affiliate disclosure: Links above are Amazon affiliate links. If you buy through them, we earn a small commission at no extra cost to you. We only recommend gear we’d actually run in our own rigs.
Final Thoughts
A well-wired fuse block is the foundation of a clean, safe, and expandable 12V system. Take the time to plan your circuits before you start running wire, label everything as you go, and don’t skip the ANL fuse on the main feed. Done right, you’ll have a system that’s easy to troubleshoot, easy to expand, and won’t leave you chasing mystery electrical gremlins on a remote trail.
For the full picture on building a 12V overlanding electrical system, start with our dual battery setup guide, then use our wire sizing chart to spec every cable before you buy. Your fuse block is the last piece of that puzzle.