
If you’ve ever been stranded in the backcountry with a dead starter battery after running your fridge overnight, you already know why a dual battery setup is non-negotiable for serious overlanding. A properly wired dual battery system keeps your vehicle battery protected while running your aux gear — fridge, lights, air compressor, winch — for as long as you need.
This guide covers everything you need to build a reliable 12V dual battery system from scratch: the right battery types, isolator options, wire sizing, fuse placement, and a step-by-step wiring walkthrough you can actually follow in your driveway.
What Is a Dual Battery Setup?
A dual battery setup uses two batteries in your vehicle: one starter battery (which cranks the engine) and one auxiliary (aux) battery (which powers your accessories). They’re kept isolated from each other so your accessories can’t accidentally drain the battery you need to start the engine.
The key component that makes this work is a battery isolator or DC-DC charger — a device that connects the two batteries when the engine is running (to charge the aux battery) and disconnects them when the engine is off (to protect the starter battery).
Dual Battery Setup: Two Main Options
Option 1: VSR / Solenoid Isolator (Budget-Friendly)
A Voltage Sensitive Relay (VSR) is the classic budget-friendly option. When it detects your alternator charging voltage (typically above 13.3V), it connects the two batteries in parallel. When voltage drops below that threshold, it disconnects them.
- Pros: Cheap ($20-$60), simple to wire, works with all battery types
- Cons: Doesn’t protect smart alternators (common on newer vehicles), charges both batteries to the same voltage (bad for mixing AGM + lithium)
Best for: Older trucks and SUVs (pre-2015) running a second AGM battery.
Option 2: DC-DC Charger (The Correct Choice for Most Builds)
A DC-DC charger (also called a B2B charger or battery-to-battery charger) is a step up from a VSR. It actively manages the charge going to your aux battery, using a multi-stage charging profile — the same kind your battery manufacturer recommends.
- Pros: Works with smart/Euro6 alternators, can charge lithium batteries correctly, extends battery life significantly
- Cons: More expensive ($100-$350), slightly more complex wiring
Best for: Any build running a lithium (LiFePO4) aux battery, or any vehicle made after 2015 with a variable-voltage smart alternator.
Choosing Your Aux Battery: AGM vs Lithium
AGM (Absorbed Glass Mat)
AGM batteries are the go-to for most overlanders on a budget. They are sealed (no spill risk), handle vibration well, and are drop-in compatible with standard wiring setups.
- Usable capacity: ~50% of rated capacity (a 100Ah AGM gives you roughly 50Ah before you risk damaging it)
- Weight: Heavy — a 100Ah AGM weighs around 60-65 lbs
- Cost: $120-$250 for a quality 100Ah unit
Lithium (LiFePO4)
LiFePO4 (lithium iron phosphate) batteries are the premium choice. They are lighter, offer 80-100% usable capacity, and last 3-5x longer than AGM.
- Usable capacity: 80-100% of rated capacity
- Weight: Around 25-30 lbs for a 100Ah unit (half the weight of AGM)
- Cost: $300-$700 for a quality 100Ah unit
Bottom line: If budget is tight, go AGM. If you are building a serious rig you plan to keep for years, LiFePO4 pays for itself within 3-4 years compared to replacing AGM batteries.
Wire Sizing: Do Not Cheap Out Here
Undersized wire is one of the most common (and dangerous) mistakes in 12V builds. Undersized wire creates resistance, which creates heat. For a full breakdown of how to choose the right AWG for every circuit in your rig, see our complete 12V wire sizing guide.
| Max Current Draw | Minimum Wire Gauge (AWG) | Example Use |
|---|---|---|
| Up to 30A | 10 AWG | LED lighting circuits |
| Up to 50A | 8 AWG | Small fridge, 12V outlets |
| Up to 100A | 4 AWG | DC-DC charger, medium inverters |
| Up to 150A | 2 AWG | Large inverters, winch circuits |
| Up to 200A+ | 1/0 AWG | Main battery interconnect cables |
Rule of thumb: For the main run between your starter battery and aux battery, always use 4 AWG minimum — and 2 AWG or 1/0 AWG if you are running a winch or large inverter.
Fuse Placement: The Rule That Could Save Your Rig
Every battery connection needs a fuse within 18 inches of the battery terminal. This is not optional — it is the single most important safety rule in 12V wiring.
- Main battery cable fuse: ANL fuse holder, rated 20-30% above your max draw (e.g., 150A ANL for a 100A system)
- Branch circuit fuses: Use a fuse block with individual inline fuses for each accessory circuit
- DC-DC charger fuse: Fuse both the input (from starter battery) and output (to aux battery) sides
Step-by-Step Dual Battery Wiring Guide
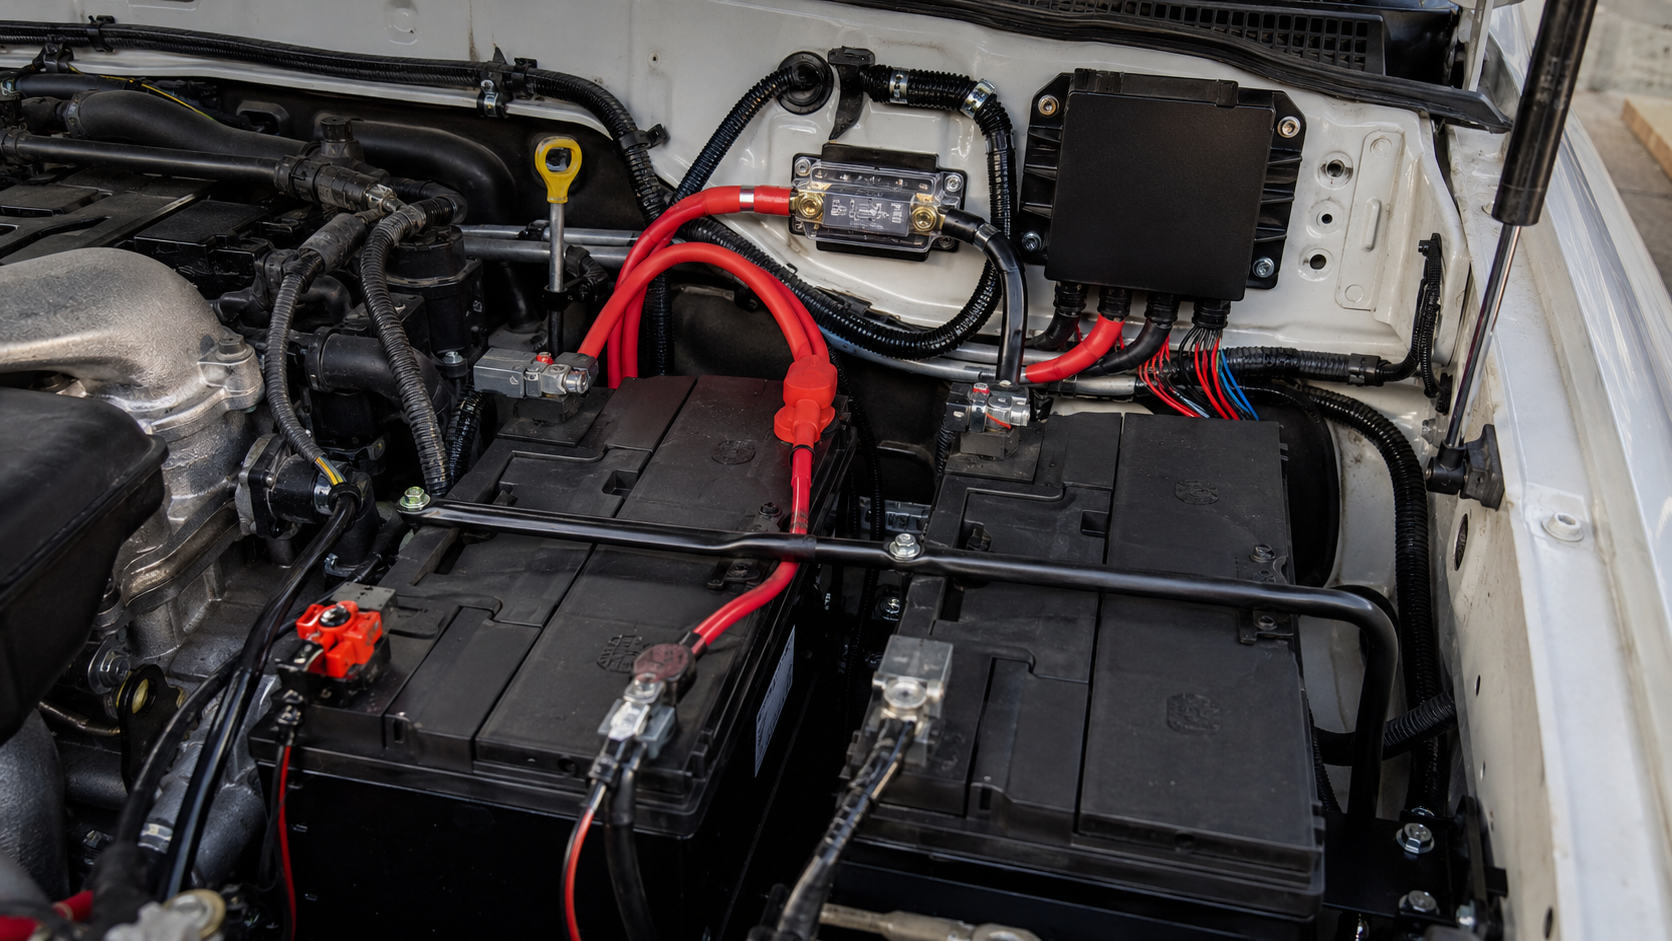
Step 1: Plan Your Layout
Before buying anything, sketch out where your aux battery will live. Common locations: under the hood next to the starter battery, in the cab (under a seat), or in the cargo area.
Step 2: Install the Aux Battery and DC-DC Charger
Mount your aux battery in a secure battery tray or box — it should not move at all even on rough terrain. Mount the DC-DC charger as close to the aux battery as practical. It needs airflow — do not box it in completely.
Step 3: Run the Main Cable
Run your main positive cable from the starter battery positive terminal, through the firewall (use a grommet to protect the wire), and to the input side of your DC-DC charger. Install an ANL fuse holder within 18 inches of the starter battery on this run. Run a second positive cable from the charger output to your aux battery positive terminal.
Step 4: Ground the System
Connect the DC-DC charger input ground to the vehicle chassis (use a clean, paint-free bolt). Connect the output ground to your aux battery negative terminal. Your aux battery negative terminal should also have a chassis ground run to a clean chassis point.
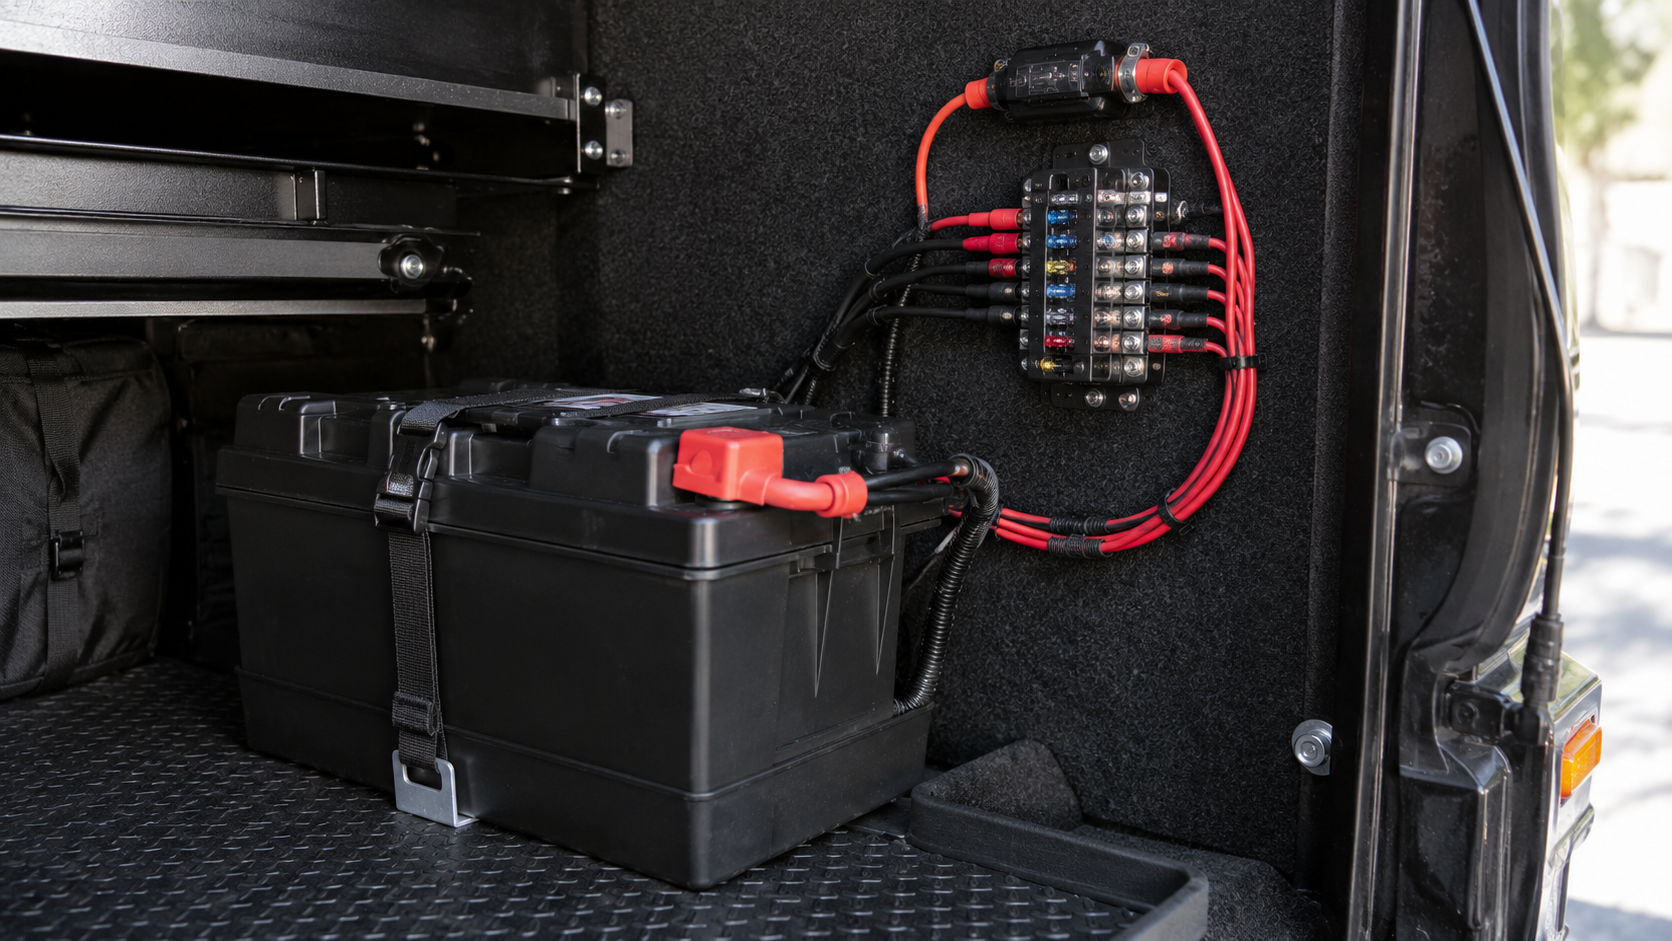
Step 5: Wire Your Fuse Block
Connect a fused positive cable from your aux battery to a distribution fuse block. This is where all your accessory circuits (fridge, USB outlets, lighting) will terminate. Label every circuit — you will thank yourself six months later.
Step 6: Test Before You Close Up
Start the engine and verify: DC-DC charger status light shows charging, aux battery voltage is climbing, no fuses blown, no unusual heat at any connection. Turn engine off and confirm accessories still run and starter battery stays at or above 12.6V after 30 minutes of load.
Common Dual Battery Mistakes to Avoid
- Using a VSR on a smart alternator vehicle: Modern variable-voltage alternators confuse VSRs — use a DC-DC charger instead
- Mixing battery chemistries on a VSR: Running AGM + lithium on a VSR will overcharge the lithium
- Undersizing wire: If the wire feels warm during use, it is undersized. Go up a gauge
- Skipping the fuse near the battery: This is the one shortcut that can burn your vehicle down
Gear You’ll Need: Complete Shopping List
These are the exact components I recommend for a reliable dual battery build. Links go to Amazon — prices update automatically so you’ll always see the current rate.
| Component | Recommended Pick | Why It’s Worth It | Link |
|---|---|---|---|
| DC-DC Charger | Renogy 40A DC-DC Battery Charger | Works with smart alternators, charges lithium or AGM, built-in MPPT solar input | Check Price → |
| AGM Aux Battery | VMAXTANKS 100Ah AGM | Deep-cycle rated, handles repeated discharge cycles, maintenance-free | Check Price → |
| Lithium Aux Battery | Ampere Time 100Ah LiFePO4 | Half the weight, 80% usable capacity, built-in BMS, 2000+ cycle life | Check Price → |
| ANL Fuse Block | Blue Sea Systems ANL Fuse Block | Marine-grade build, correct placement for protecting the main run | Check Price → |
| Fuse Distribution Block | Blue Sea Systems ST Blade Fuse Block | Individual fused circuits for every accessory — clean and labeled | Check Price → |
| Main Cable | 4 AWG or 2 AWG Welding Cable (by the foot) | Flexible, rated for high current, easier to route than rigid cable | Check Price → |
Affiliate disclosure: Links above are Amazon affiliate links. If you buy through them, we earn a small commission at no extra cost to you. We only recommend gear we’d actually run in our own rigs.
Final Thoughts
A well-built dual battery setup is the foundation of any serious overland electrical system. The DC-DC charger path costs a bit more upfront but protects your alternator, works with modern vehicles, and is the right long-term choice — especially if you ever plan to upgrade to lithium later. Budget $300-$500 for a complete DIY install with quality components, and you will have a system that outlasts the vehicle if you do it right.
Have questions about your specific vehicle or build? Drop them in the comments — we read every one.